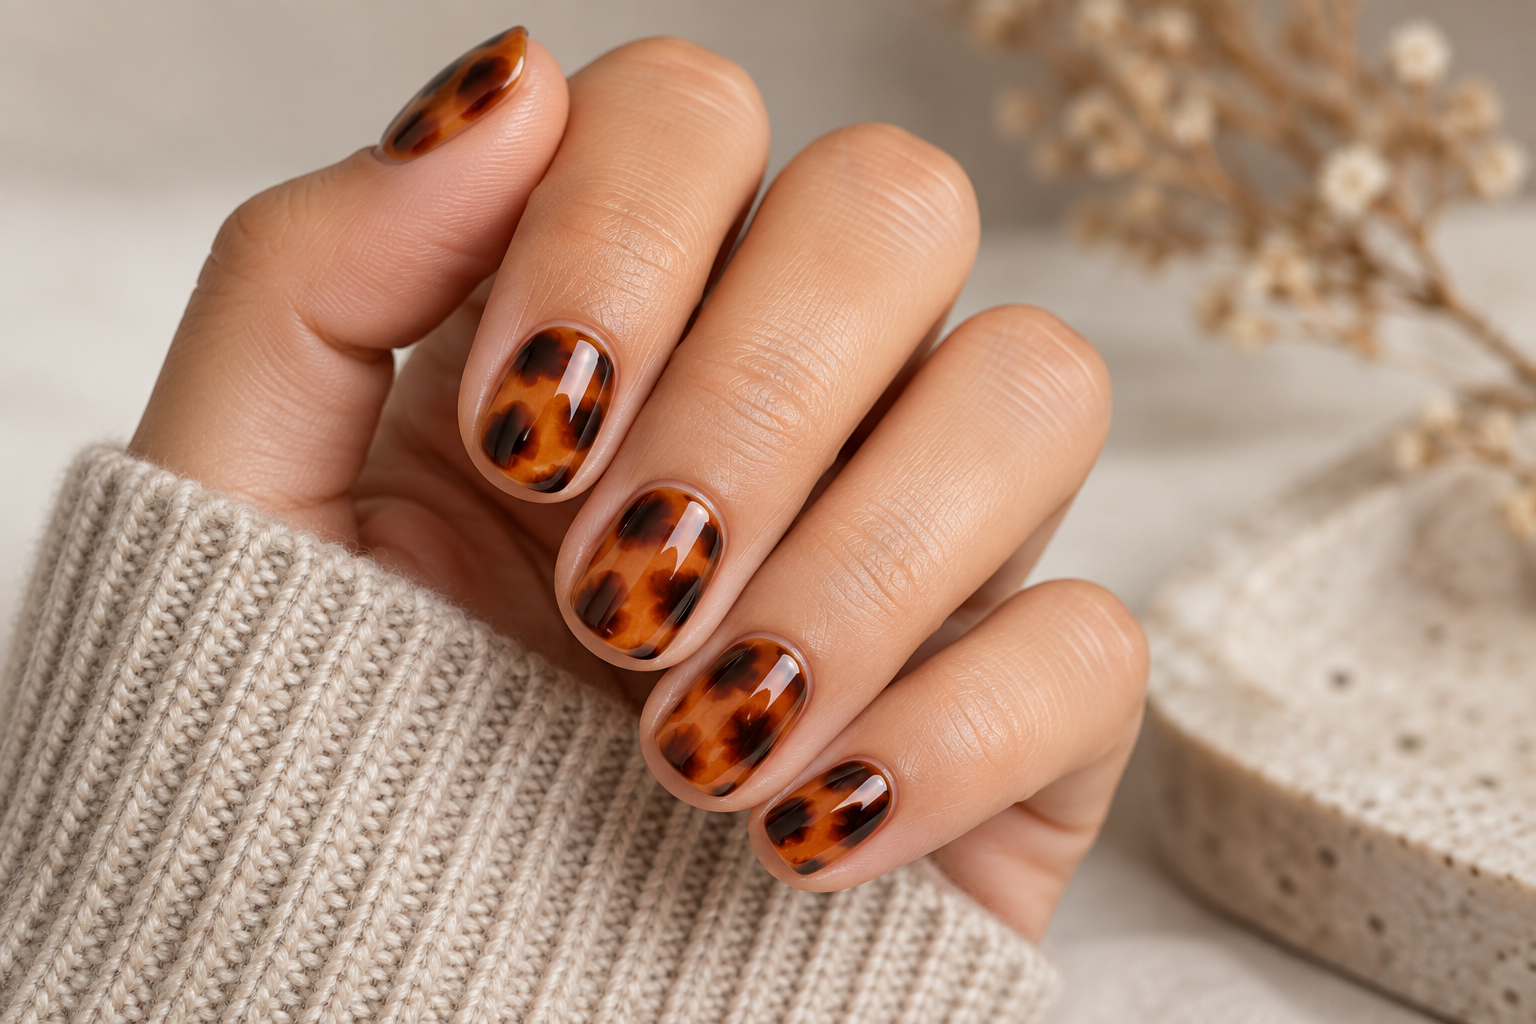
Tortoiseshell nail art looks complicated because the finished pattern contains several translucent layers, but the design does not depend on perfectly repeated shapes. That makes it surprisingly adaptable to short nails.
On short nails, reduce the amount of information in the design rather than merely shrinking every mark. A short nail needs fewer spots, more visible background and thinner layers so the warm amber, brown and black tones can still read separately.
What makes tortoiseshell look like tortoiseshell?
The pattern usually combines a translucent honey, amber or caramel base with irregular deeper-brown and near-black areas. Some of the dark marks appear to sit underneath the warm surface rather than directly on top of it.
That layered depth is what separates tortoiseshell from a simple brown-and-black spotted manicure.
You do not need to copy a real shell exactly. The manicure works when the colors overlap unevenly and the transparency remains visible.
Short nails need fewer large shapes
If a long-nail reference shows six or seven dark marks on each nail, do not shrink all of them into tiny dots.
Try two or three irregular dark areas instead. Leave sections of the amber base completely open. On another nail, place one larger mark near the side and a smaller mark toward the tip.
This gives the eye enough space to read each layer.
For more examples of scaling details to practical lengths, see StyleVeya’s short natural nail designs.
The base should be translucent, not chalky
An opaque orange-brown base can make the design look flat before you even add the spots.
A jelly-like amber, sheer caramel or warm honey tone is more useful because the darker layers can show through it. If your polish is very opaque, you may be able to thin the visual effect by using one very light coat rather than building full coverage immediately.
Follow the instructions of the polish or gel system you are using; do not mix products with random solvents just to make them sheer.
Build the pattern in layers
A simple approach for ordinary polish is:
- Apply a thin translucent amber or caramel base.
- Add a few irregular medium-brown marks.
- Let them dry enough that they will not smear completely.
- Add smaller, deeper brown or near-black areas inside or beside some of the first marks.
- Apply another very thin translucent warm layer if you want some spots to look buried.
- Finish with a glossy top coat.
The second sheer layer is what creates the “under glass” effect. You do not have to cover every dark area with it. Uneven depth makes the pattern more convincing.
Do not make every nail identical
Repeating the exact same three spots on all ten nails makes the design look stamped rather than organic.
Vary the placement:
- One nail can have a larger dark patch near the cuticle.
- Another can have two marks on opposite sides.
- A third can remain mostly amber with one small deep-brown accent.
The palette creates unity, so the placement does not have to match.
Accent nails make the design easier to wear
If a full tortoiseshell manicure feels busy, use the pattern on two or four nails and keep the others solid.
Chocolate brown, caramel, sheer nude and creamy beige all work well beside tortoiseshell. You can also use a micro French tip in one of the brown shades to connect the solid nails with the patterned accents.
StyleVeya’s French-tip nail ideas can help if you want to combine the print with a cleaner tip design.
A tortoiseshell French tip works well on short nails
Instead of covering the entire nail, use a sheer nude base and place the tortoiseshell pattern only at the tip.
On very short nails, a micro tip may not provide enough room for visible layering. Make the patterned tip slightly deeper, then keep the markings simple—perhaps one medium-brown area and one darker accent per nail.
The result still reads as tortoiseshell without taking over the whole nail plate.
Round and squoval shapes are especially forgiving
Short round and squoval nails give the pattern a compact surface without a narrow point. That makes it easier to keep the marks large enough to see.
Square nails create a more graphic version because the straight free edge contrasts with the organic pattern. Almond nails can look elegant, but the narrow tip requires more restraint.
If you are deciding which outline suits your current length, StyleVeya’s nail-shapes guide compares the practical differences.
Short almond tortoiseshell needs breathing room at the tip
If you have enough free edge for a short almond shape, keep the largest dark marks through the center of the nail. Use smaller, lighter detail near the tapered end.
Overcrowding the point makes the nail look visually shorter. StyleVeya’s short almond nail designs show how negative space helps tapered short nails stay balanced.
Gloss is part of the effect
Tortoiseshell gets much of its richness from light passing through and reflecting across the layers.
A glossy top coat makes the amber base look deeper and helps separate marks that may otherwise merge visually. Matte tortoiseshell can be interesting, but it changes the idea completely: the pattern looks softer, flatter and more like printed textile.
If your goal is the classic resin-like depth, gloss is the easier choice.
How to keep black from taking over
Near-black accents are useful, but they should not become the largest part of every nail.
Start with medium brown. Add the deepest color only in selected areas. You can always add more dark detail at the end, while removing an oversized black patch is much harder.
If the manicure begins reading as black-and-orange rather than tortoiseshell, another thin amber layer may soften some of the contrast.
Three wearable versions
1. Classic amber tortoiseshell
Use a sheer honey base, medium-brown irregular spots and a small amount of very dark brown. Keep every nail patterned but vary the placement.
2. Tortoiseshell accents with chocolate brown
Paint two nails on each hand in the pattern and use glossy chocolate on the others. This is easier to maintain and makes the detailed nails stand out.
3. Sheer nude with tortoiseshell corners
Keep most of each nail transparent or nude and place a small tortoiseshell patch near one outer corner. This is the lightest and most minimal version.
Do not confuse detail with realism
You do not need dozens of tiny marks to make the pattern recognizable. In fact, too much detail often makes short nails look muddy.
The illusion comes from the color family and layered transparency. A few well-placed shapes are usually more convincing than a crowded nail covered in miniature spots.
At-home application is easier if you stop chasing perfect spots
Use a small brush or dotting tool and allow the marks to stay uneven. If one shape looks too round, pull one edge outward slightly. If another looks too dark, cover only part of it with a thin translucent layer later.
Do not repeatedly work the same area while ordinary polish is half-dry. That can drag the lower layer and create texture you did not intend.
Protect the free edge if your manicure chips early
A dark tortoiseshell manicure can show tip wear quickly because the contrast against the natural nail is obvious.
Use thin coats, allow adequate drying or curing for your product system and protect the free edge according to the manufacturer’s instructions. If tip chipping is a recurring problem, see StyleVeya’s guide to why polish chips at the tips first.
Reference photos are inspiration, not a stencil
A long acrylic tortoiseshell manicure can contain more color variation than a short natural nail can carry comfortably. Borrow the parts that translate: the amber background, translucent depth, irregular brown shapes and glossy finish.
Then remove whatever does not fit your nail length.
A short tortoiseshell manicure works better when the pattern is edited rather than packed with detail. It is the one where you can still see separate layers, open amber space and deliberate irregularity from a normal viewing distance.