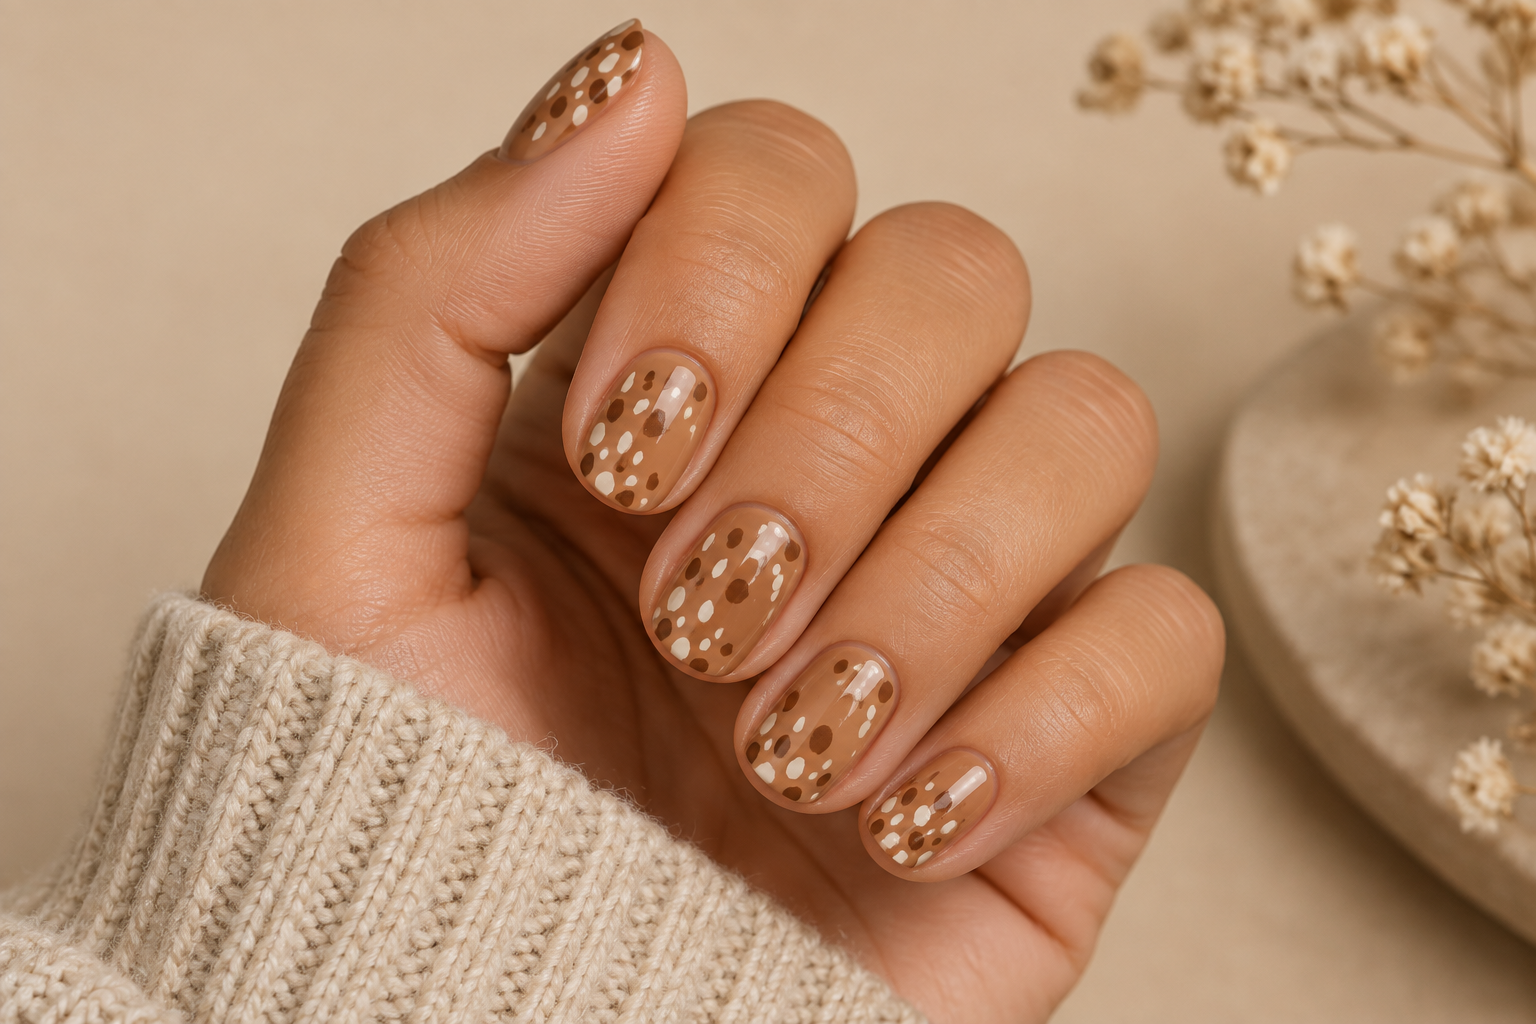
Deer-print nails sit on the quieter side of animal-inspired manicure ideas. Instead of the strong black outlines and high contrast associated with leopard print, the look works best with warm brown, tan, cream and soft pale spotting. The result can feel autumnal and textured without looking like a costume pattern.
The main challenge is scale. A deer-inspired pattern that looks balanced on a long extension can become crowded on a short natural nail. The answer is not to make every detail microscopic. It is to simplify the design so the color, spacing and irregularity do most of the work.
What makes a manicure read as deer print?
There is no single official deer-print nail template, and real animal markings vary. For manicure purposes, the visual shorthand is usually a warm neutral base with softer cream or pale spots, sometimes with deeper brown shadowing around selected areas.
The pattern should feel organic rather than geometric. If every dot is the same size and equally spaced, the result looks more like polka dots. Slight differences in shape, distance and opacity make the pattern feel more natural.
That does not mean you need to reproduce an animal coat literally. Treat deer print as inspiration rather than trying to reproduce an animal coat literally.
Start with a base color you would wear on its own
If you are unsure whether deer print will feel too busy, choose a base shade you already like as a plain manicure. Caramel, camel, mushroom brown, warm taupe, cocoa and muted tan all work well because the pattern can be added without the background becoming harsh.
A sheer beige or jelly-brown base gives an even softer result because some of the natural nail remains visible underneath.
If practical neutral manicures are your preference, StyleVeya’s short natural nail designs offer more low-contrast directions.
Short nails need fewer spots, not smaller spots everywhere
One of the easiest mistakes is trying to copy every mark from a long-nail reference onto a smaller surface. That creates visual noise.
Instead, place two or three larger irregular marks on some nails and leave more open space between them. On another nail, use only a small cluster near one corner. The pattern will still read, but the nail will not feel packed.
Think of the design as a composition. Empty space is part of it.
Irregular placement looks more convincing
Do not build the pattern in rows. Place one mark slightly off-center, another closer to the sidewall and a smaller one near the tip. Rotate the direction from nail to nail.
You can also vary the opacity. A pale cream spot over a caramel base can look soft and clean; a slightly translucent spot can look even more blended.
If you are painting at home, use a dotting tool, the rounded end of a bobby pin or a very small brush. Touch the polish down lightly rather than pressing hard. Then distort a few circles with the tip of the brush so they do not all remain perfectly round.
Accent nails are usually easier to wear
You do not need ten fully patterned nails.
A practical set could use deer print on the ring and middle fingers, with the remaining nails painted in one of the background shades. Another option is a single patterned thumb paired with solid brown, cream or nude.
This approach is especially useful if you wear shorter nails or work somewhere that makes highly detailed nail art feel impractical.
Try a French-tip version if you want less pattern
Instead of covering the whole nail, keep a sheer nude base and place the animal-inspired pattern only across the tip. On a short nail, make the patterned edge slightly deeper than a micro French line so there is enough room for the markings to be visible.
A warm-brown tip with two or three cream spots can communicate the idea without turning the entire manicure into animal print.
For more tip variations, StyleVeya’s French-tip nail ideas show how much the width of the tip changes the final effect.
Glossy and matte finishes create very different moods
A glossy top coat makes the brown tones look richer and gives the manicure a polished, almost lacquered finish.
Matte top coat reduces reflection and makes the palette feel softer and more suede-like. That can suit deer-inspired neutrals well, but matte finishes show surface texture more clearly. If the design is lumpy or the layers are uneven, gloss is more forgiving.
You can also mix finishes: keep the solid nails glossy and make the patterned accent nails matte, or reverse the combination.
Square, squoval and round nails suit the pattern differently
On short square nails, the straight free edge gives the manicure a more graphic feel. Squoval nails soften that geometry. Round nails make the design feel gentler because there are no sharp corners competing with the organic spots.
There is no universally correct shape. Choose the one that works with your natural nail and daily routine. StyleVeya’s nail-shapes guide explains the practical differences between square, squoval, round, oval and almond.
Short almond nails can work, but keep the taper soft
If your nails have enough free edge for a short almond shape, the pattern can look elegant because the tapered outline already adds movement. Avoid crowding the narrow tip with too many spots.
Keep the largest marks through the middle of the nail and use smaller details near the point. StyleVeya’s short almond nail designs show how scale becomes more important as the tip narrows.
Three easy deer-print combinations
1. Caramel and cream
Use a warm caramel base and irregular cream spots. This is the softest version and works well if you want the pattern to remain subtle.
2. Cocoa, tan and beige
Paint a medium-brown base, then add tan and beige marks in different sizes. Keep the darkest color in the background rather than outlining every spot.
3. Sheer nude with brown corner accents
Leave most of the nail sheer and paint a small brown animal-inspired patch near one side or corner. Add two or three pale marks inside that patch. This is the most minimal interpretation.
What separates deer-inspired nails from leopard nails?
Leopard nail art often relies on dark outlines or broken rings around lighter centers. Deer-inspired nails generally look softer when you skip those heavy outlines and let the pale spotting sit directly on a warm neutral background.
If you add black around every mark, the design will quickly move toward leopard territory. That is not wrong if you like it, but it is a different visual effect.
Keep the application thin
Detailed nail art can become bulky if every color is applied in a thick blob. Use thin layers and let each layer dry or cure according to the product system before adding the next.
For ordinary polish, resist the temptation to keep touching a spot while it is half-dry. That is when edges become rough and streaky. If a mark is not perfect, let it dry and correct it with a second thin layer.
Make the design last longer by protecting the edge
Animal print does not chip differently from other nail art, but short patterned nails can look messy quickly if a dark base chips at the tip. Apply thin coats and protect the free edge according to your polish system.
If tip wear is a recurring problem, StyleVeya’s guide to why nail polish chips at the tips first explains how daily friction, water exposure and application can affect durability.
Do not let the reference image control the whole manicure
A good deer-print manicure should still suit your own nail length, shape and tolerance for detail. If your inspiration image uses long extensions, ten patterned nails and very high contrast, you can borrow only the palette or one design element.
The most wearable version is often the one that looks intentional from arm’s length, not the one that reproduces the greatest number of tiny spots. Choose a warm base you genuinely like, vary the placement, leave breathing room and stop before the pattern becomes busier than the nails themselves.